

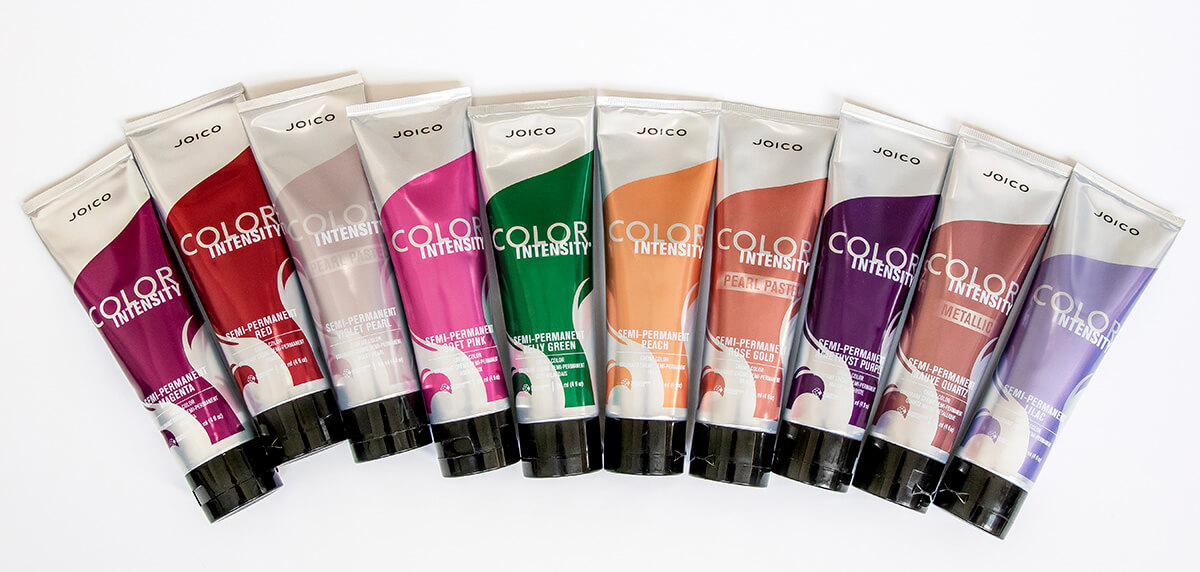
Inspired by the most beautiful light show in the sky, Northern Lights, Larisa wanted to use our two NEW Color Intensity bold shades – Kelly Green and True Blue – to create this head-turning look.
Color Intensity
Blonde Life Lightening Powder with 20 Volume LumiShine Developer
PRELIGHTENING FORMULA FOR OCCIPITAL AROUND TO SIDES:
Blonde Life Lightening Powder with 25 Volume LumiShine Developer (mix ½ 20 Volume and ½ 30 Volume together)
PRELIGHTENING FORMULA FOR CROWN TO HAIRLINE:
Blonde Life Lightening Powder with 30 Volume LumiShine Developer
TONING FORMULA:
2 part LumiShine Demi-Liquid 9NV+ 1 part LumiShine Demi-Liquid 10N + 3 drops of LumiShine Demi-Liquid 1NV with 3 parts 5 Volume LumiShine Developer.
COLOR INTENSITY FORMULAS:
True Blue
Kelly Green
Peach
Orchid
Technique

STEP 1:
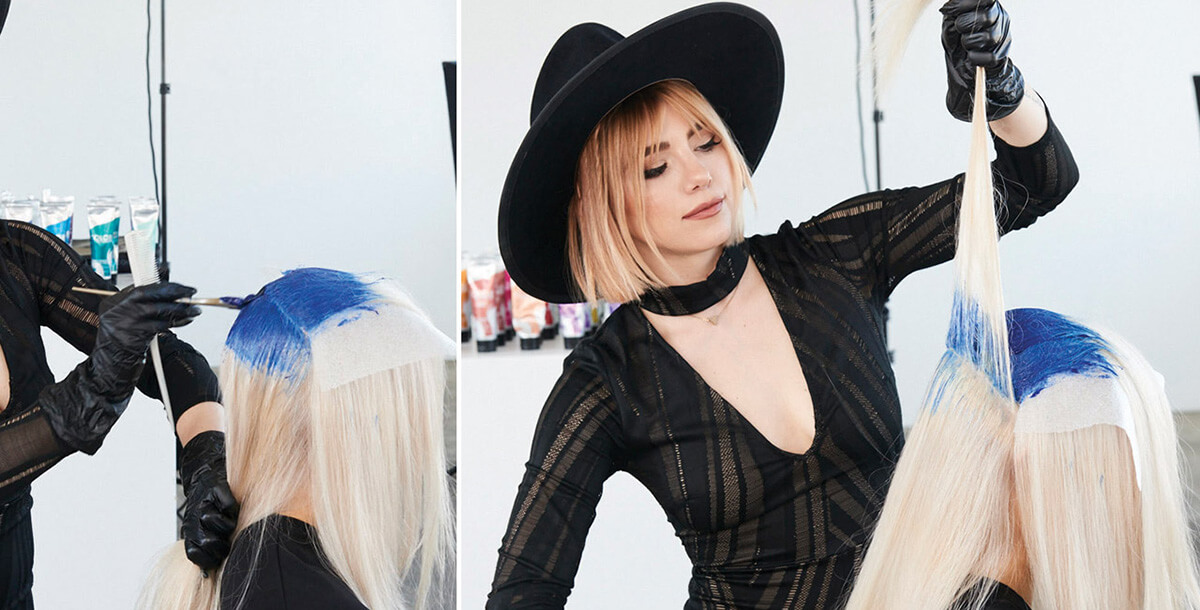
Prelighten hair to a level 9, and apply toning formula to hair until is an icy white. Then, start with the hair in a center part with three sections: one on either side of the part from the back of the ears forward, and one in the back. Using True Blue, start at the center part, apply a shadow root in a teardrop shape at the top front of the head approximately 2 inches from the scalp, and move 4 inches from the scalp in back at the nape.
STEP 2:
Apply meche over the top, and continue to apply the shadow root in the back section, bringing the color down about 3 to 4 inches. Lay each section over the meche as you are working downward towards the hairline. As you apply the shadow root, take thin, see through slices so you get an even saturation. This is important to avoid missed spots.

STEP 3:
After the shadow root is applied in the back, take the back section down, and part it horizontally just below the ear across the back with a large zig zag weave. Take a fine weave from the zig zag and clip it out of the way.
STEP 4:
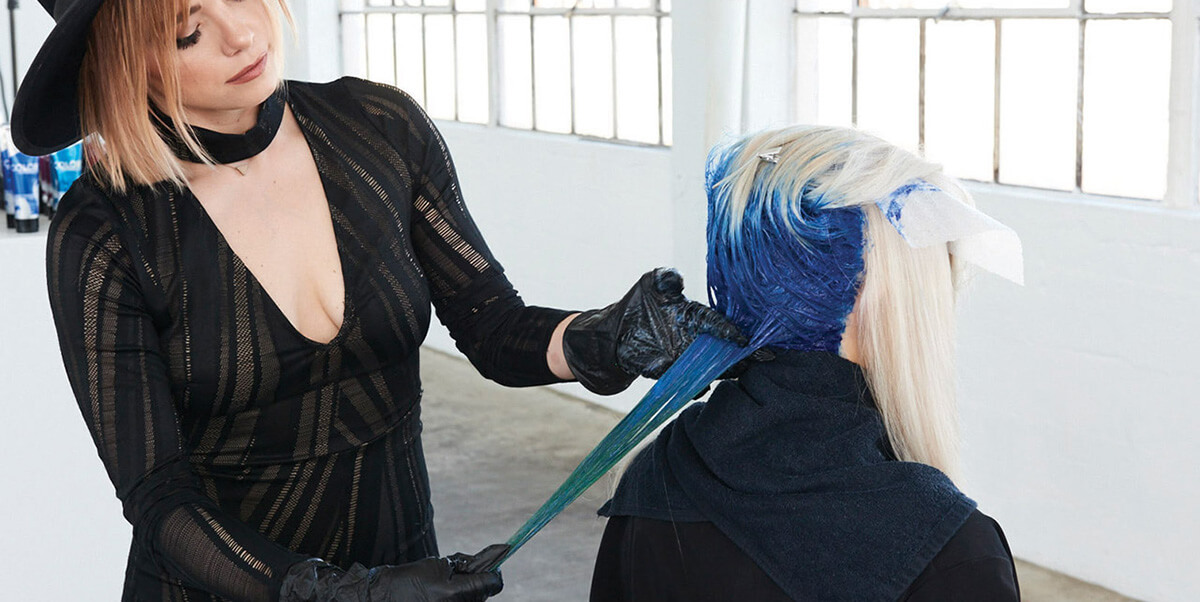
On the larger bottom section, apply Intensity Kelly Green from the ends through the True Blue shadow root. Scissor your fingers where the colors meet to melt shades together.

STEP 5:
Next, take the smaller weave section and melt Peach from the True Blue through the ends.
TIP: Make sure to apply meche between the colors so they don’t bleed.

STEP 6:
Next, take a second large, horizontal, zig zag parting from ear to ear; then take a fine weave from the top of this section and pin it away.
STEP 7:
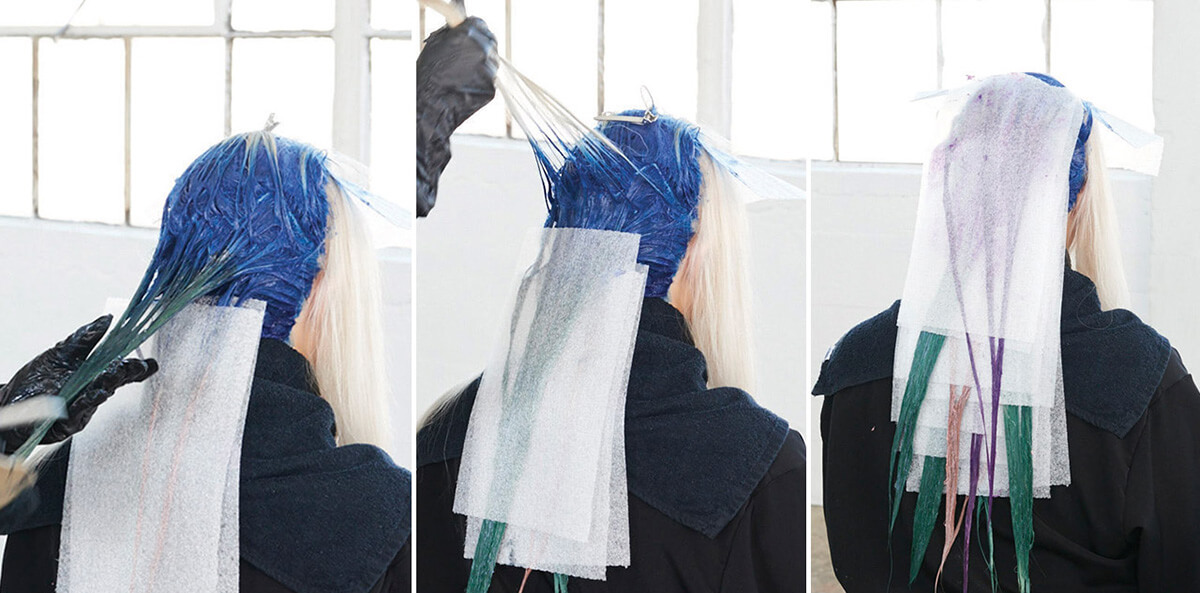
Apply Kelly Green to the large bottom zig zag section from the ends, melting into the True Blue. Now, take your fine-weave section down and melt in Orchid. Continue until you reach the top of the head, alternating between Orchid and Peach as your highlights, and Kelly Green as your base. You should end up with about 4 of these sections.

STEP 8: FRONT RIGHT
Apply the shadow root with True Blue from the center down towards the ear. For the front sections, keep the teardrop shape in mind and bring the color out about 1½ to 2 inches from the scalp. Just above the ear, take a larger diagonal back slice, then a smaller weave from the top of the slice and pin it away. The weave should be thicker in front and thinner towards the back.

STEP 9:
Melt Kelly Green into the True Blue on the bottom section of the slice. Then, apply Orchid to the smaller weave section. Remember to place meche between your colors! TIP: Having thicker weaves towards the front will give you those “money pieces” where the accent color will pop. The thinner weaves towards the back help blend the front and back sections together.

STEP 10:
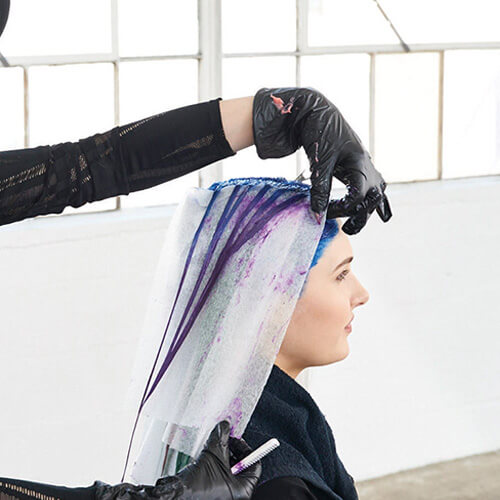
Next, take a diagonal back slice above the last section; use the same weave technique to melt Kelly Green on the bottom section and Peach on top.
STEP 11:
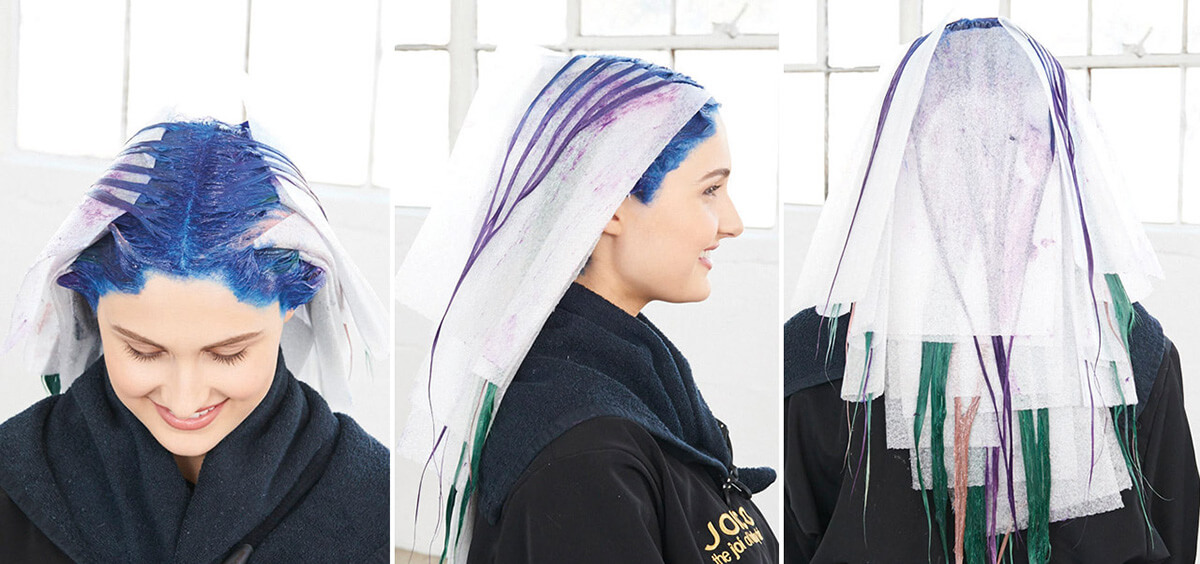
Repeat again on the top slice (pinned away), but this time use Orchid as your accent color. Repeat the entire technique on the other side.
STEP 12:
COMPLETE APPLICATION: Let this process for 25 minutes, then shampoo and rinse with Joico Color Co+Wash to keep the shades vibrant.

